DIY Bird Bath Ideas For A Safer Backyard Water Spot
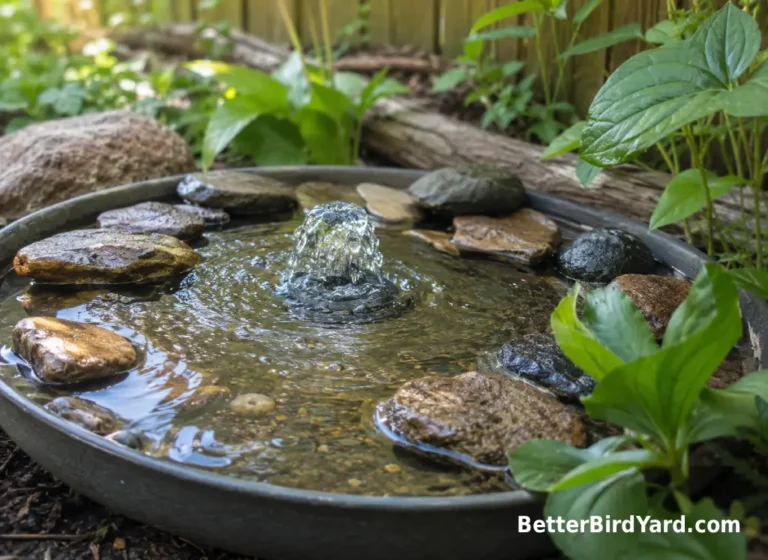
A good DIY bird bath does not need to be fancy. For most backyard bird watchers, the best setup is a shallow, stable basin with a slightly rough surface, fresh water, and a spot that gives birds a clear view of the yard. That can be a plant saucer on a sturdy pot, a thrifted ceramic dish on a flat stone, a simple concrete basin, or a small bird bath with a gentle fountain.
The part that matters most is not how decorative it looks. It is whether birds can stand safely, drink easily, bathe without slipping, and avoid being surprised by cats or other predators. The National Wildlife Federation recommends bird baths no more than three inches deep for small birds, with texture or stones if the surface is slippery. Cornell Lab’s All About Birds also emphasizes clean water, recommending water changes at least every three days and more often in warm weather.
This guide walks through practical bird baths DIY readers can make with common materials, including small-space options, DIY bird bath fountain ideas, concrete bird bath molds, placement, and cleaning. The goal is a water feature that helps birds and stays realistic for a normal backyard, patio, or balcony routine.
The Quick Answer: Keep Your DIY Bird Bath Shallow, Stable, And Clean
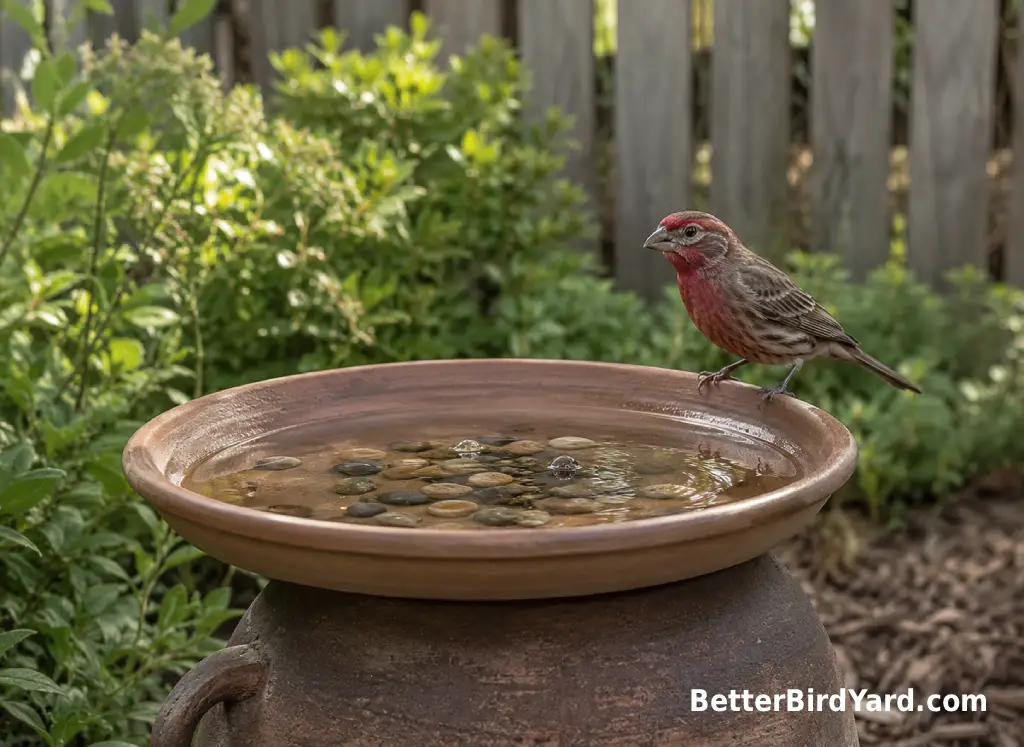
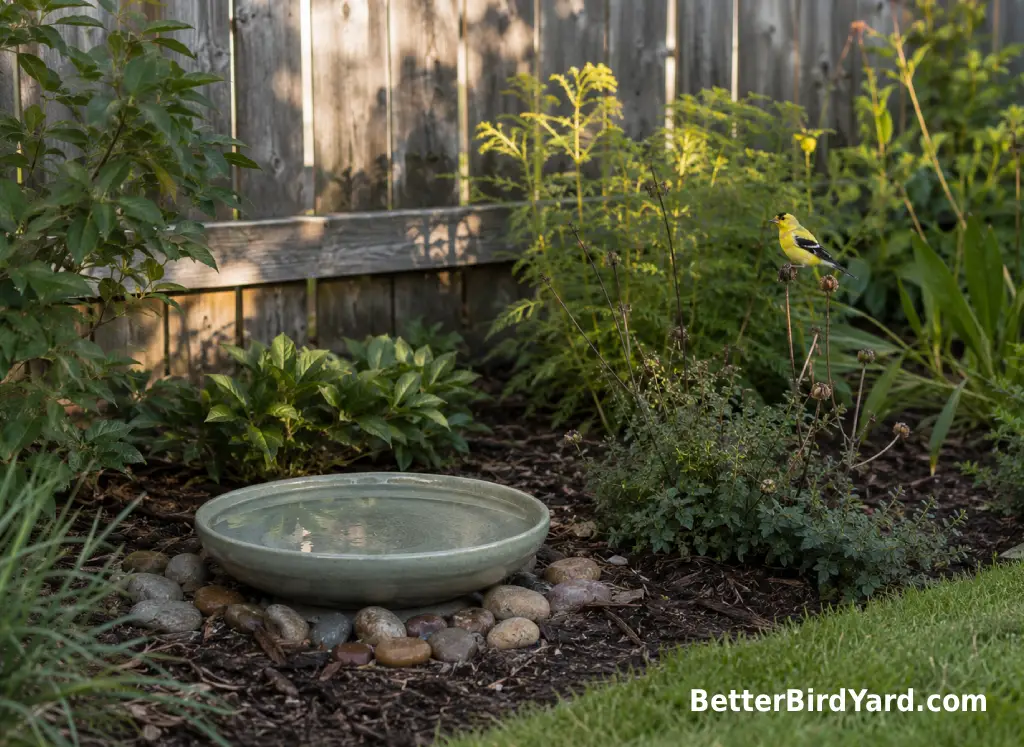
The easiest DIY bird bath is a wide, shallow dish set on something heavy enough that it cannot wobble. A glazed or unglazed plant saucer, pie plate, shallow serving bowl, or thrifted ceramic basin can work if it is easy to scrub and does not have sharp edges, peeling paint, or unknown coatings that may leach into water.
A useful starting setup looks like this:
- A basin about one to three inches deep, with very shallow edges for small birds.
- A rough or textured bottom, or a layer of clean stones for traction.
- A stable base, such as a heavy planter, flat stump, concrete block, or low garden stand.
- A shaded or partly shaded location that is easy for you to reach with a hose or watering can.
- A cleaning routine you can actually keep up with.
If you only change one thing, start with depth. Many beginner DIY bird baths are too deep, too slippery, or too tippy. Birds are most likely to use water that lets them step in gradually, grip the surface, and leave quickly if they feel unsafe. NWF specifically recommends a bath no more than three inches deep and a textured interior or stones when the surface is too slick.
For a first project, simple beats elaborate. A low, sturdy, washable bird bath is usually better than a tall, ornate one that is hard to clean or easy to knock over.
What Makes A Bird Bath Safe And Useful For Backyard Birds?
Birds use water for drinking and bathing, but they are cautious while doing it. A bathing bird has wet feathers, lowered attention, and less ability to launch away instantly. That is why a safe bird bath needs both comfort and escape room.
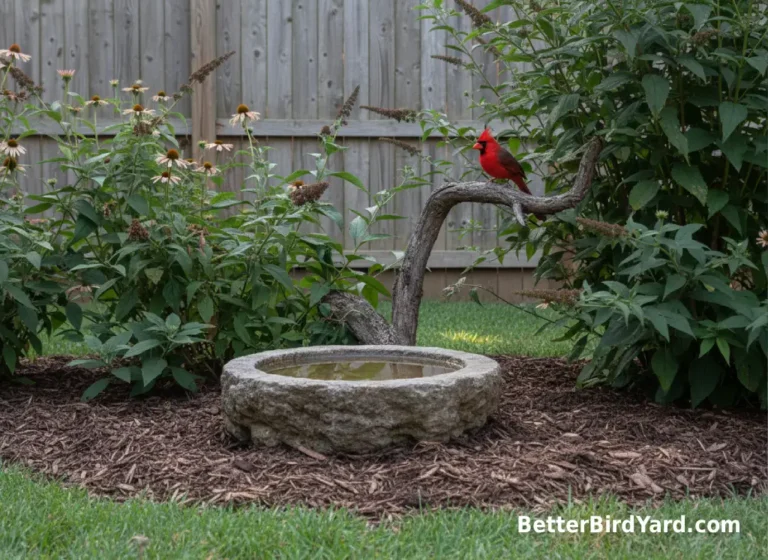
Think in three layers: the basin, the base, and the surroundings. The basin should be shallow enough for small songbirds, with a surface they can grip. The base should be level and steady. The surroundings should offer nearby shrubs or small trees for approach and escape, without placing the bath directly inside dense cover where a cat could hide.
Texture matters more than most beginners expect. Smooth glass, glazed ceramic, and slick plastic can be pretty, but small birds may hesitate if their feet cannot grip. Adding a few clean, rounded stones can create shallow landing spots. Do not use sharp gravel, dyed decorative stones, or anything that sheds flakes into the water.
A bird bath also needs to be easy for you. If it is too heavy to tip, too ornate to scrub, or tucked behind plants where you forget it, it will become dirty fast. Cornell Lab’s All About Birds recommends scrubbing right away if algae appear and changing bird bath water at least every three days, more often during warm weather.
In a small yard, I would choose a simple basin over a decorative statue every time. Birds do not need a showpiece. They need clean, shallow water in a spot that feels safe.
DIY Bird Bath Ideas For Small Yards, Patios, And Renters
You do not need a large garden to offer water. Some of the best DIY bird bath ideas are small, movable, and inexpensive enough to test for a week before committing.
For patios and rentals, try one of these setups:
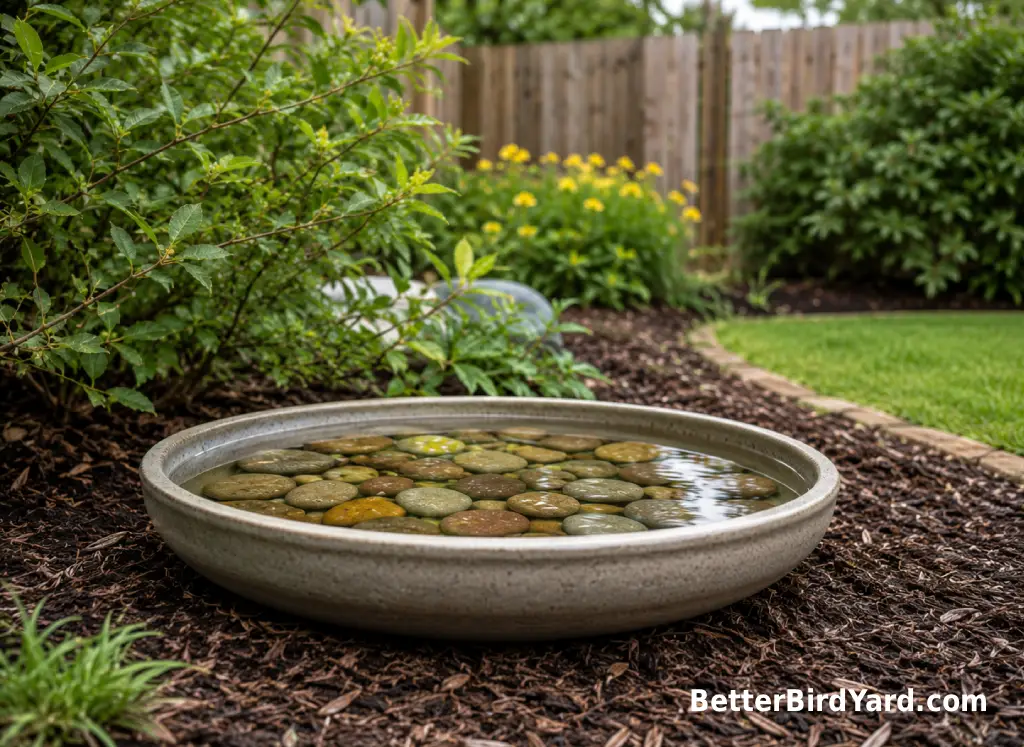
- A large plant saucer on a heavy ceramic pot filled with soil for stability.
- A shallow bowl set on a low outdoor side table, weighted underneath if needed.
- A deck-mounted basin, if your lease or HOA allows attached outdoor items.
- A ground-level saucer tucked near potted native plants, but not hidden inside dense foliage.
- A small solar fountain basin that can be lifted, emptied, and scrubbed easily.
Many readers look for DIY bird bath Dollar Tree ideas or budget store projects, and those can work if you stay selective. Choose sturdy, washable pieces with no flaking finishes, no glitter, no loose paint, and no sharp seams. Skip lightweight plastic bowls that tip in wind, metallic containers that may heat up in strong sun, and decorative items that are not meant to hold water outdoors.
Renters should also think about neighbors below, balcony weight, and local rules. A shallow dish can still overflow during rain or splash during bathing. Put it where spilled water will not drip onto someone else’s space, damage wood decking, or create a slippery walkway.
For more habitat ideas that do not require a large yard, pair your bird bath with a few pots of regionally appropriate native plants and a simple cleaning routine.
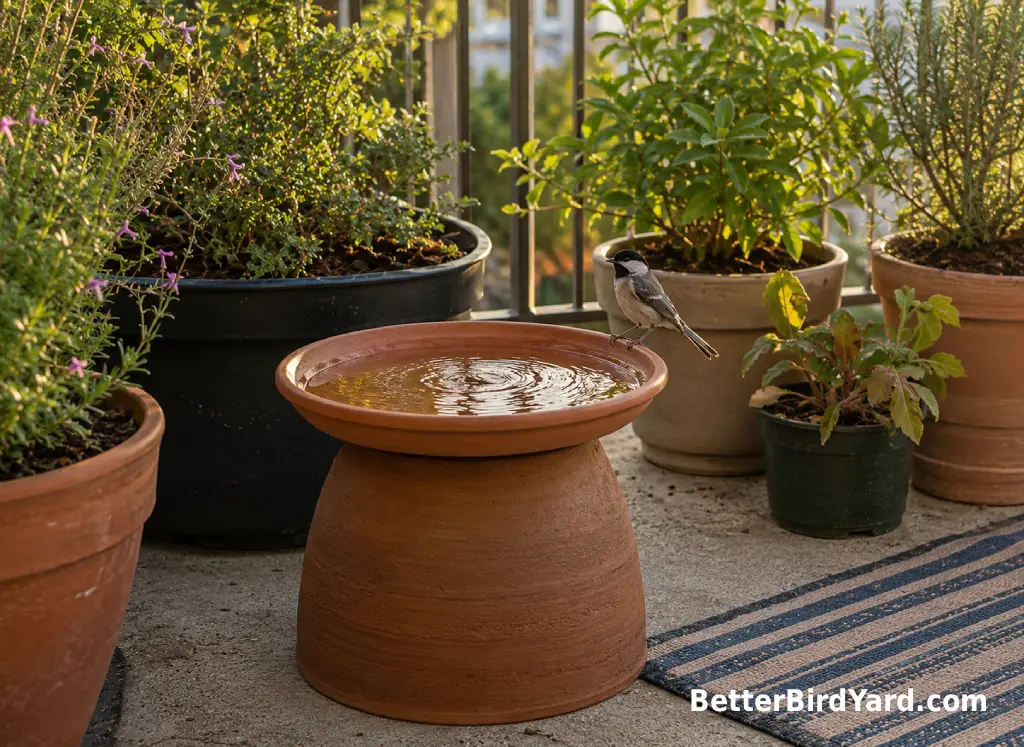
How To Build A Simple DIY Bird Bath In 6 Steps
This is the easiest bird bath DIY project for beginners because it avoids drilling, wiring, concrete pouring, or permanent installation.
- Choose a shallow basin. Look for a saucer or bowl with a broad rim, a gentle slope, and a depth of one to three inches.
- Pick a stable base. A heavy planter, flat stump, short pedestal, or concrete block works better than a narrow stand.
- Test the wobble. Set the basin on the base and press lightly around the rim. If it rocks, adjust the surface or choose a wider base.
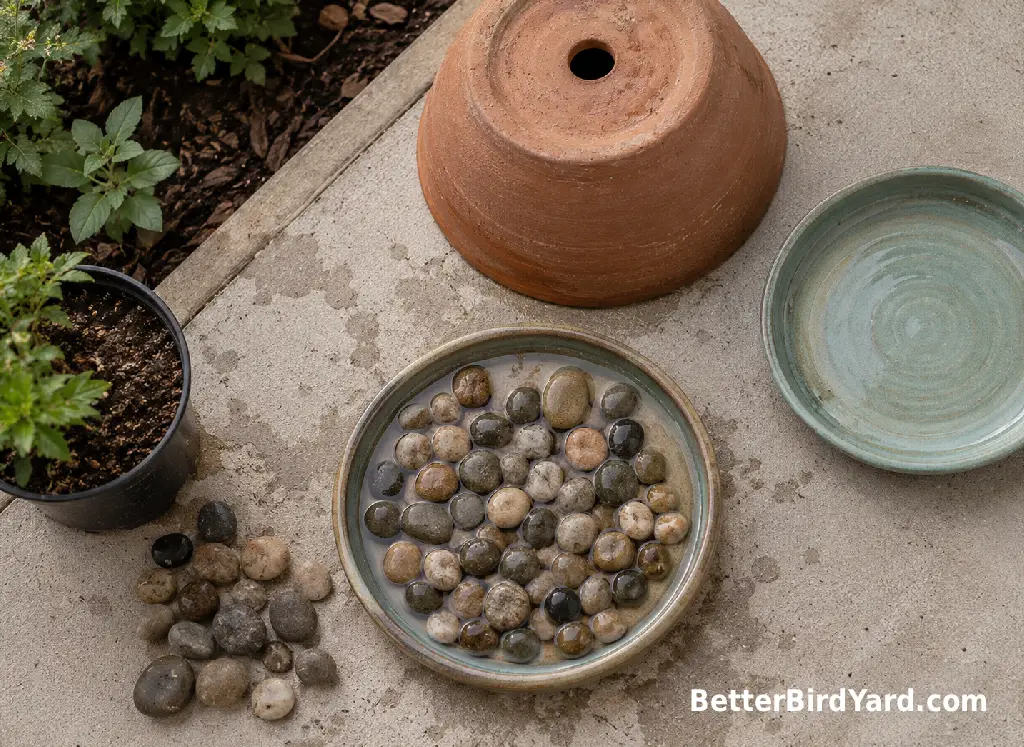
- Add traction. Place a few clean, rounded stones in the basin so small birds have shallow footing.
- Fill lightly. Add fresh water, keeping part of the basin very shallow.
- Watch and adjust. If birds ignore it, move it a few feet, add a gentle drip, or reduce nearby disturbance.
Do not glue the basin down unless you are sure you can still clean it thoroughly. Being able to lift, dump, scrub, rinse, and refill the bath is one of the biggest advantages of a homemade design.
A common mistake we see is building the bath too tall and narrow. Tall pedestal baths can work, but they need weight and balance. In windy yards, near active kids, or on apartment patios, a lower, heavier setup is safer and easier to maintain.
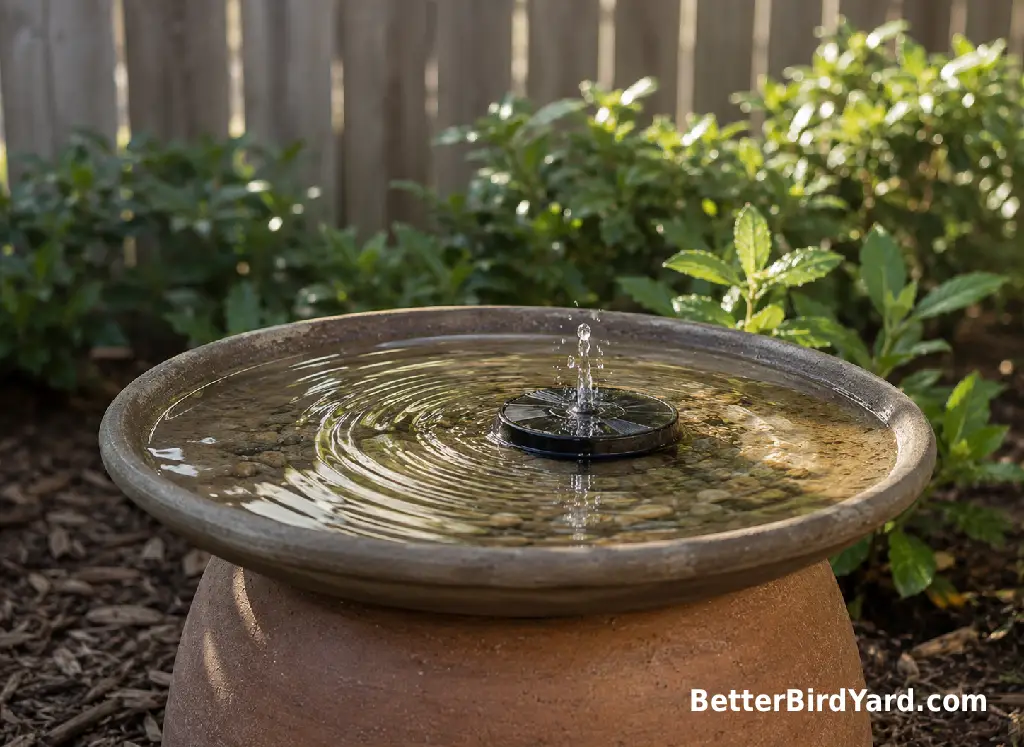
Adding A DIY Bird Bath Fountain Or Dripper
A DIY bird bath fountain can make a simple basin more noticeable to birds. Moving water catches light, creates sound, and can help reduce stagnant conditions. NWF notes that fountains, drippers, and misters can attract more birds than basic still bird baths, and moving water can discourage mosquitoes from breeding.
For beginners, keep the fountain gentle. A tiny solar bubbler, low dripper, or slow hose-fed drip is usually better than a tall spray that empties the basin or splashes water onto a deck. Birds are more likely to use soft ripples and shallow trickles than a noisy, forceful jet.
Before adding a fountain, ask three practical questions:
- Can I still empty and scrub the basin easily?
- Will the pump run dry if water evaporates on a hot day?
- Does the spray make the basin deeper, slippery, or harder for small birds to use?
Solar fountains are popular because they avoid outdoor cords, but they are not maintenance-free. Pumps can clog with algae, feathers, grit, and leaves. Clean the intake regularly, refill the basin before it gets low, and bring small pumps indoors during freezing weather unless the product is designed for winter use.
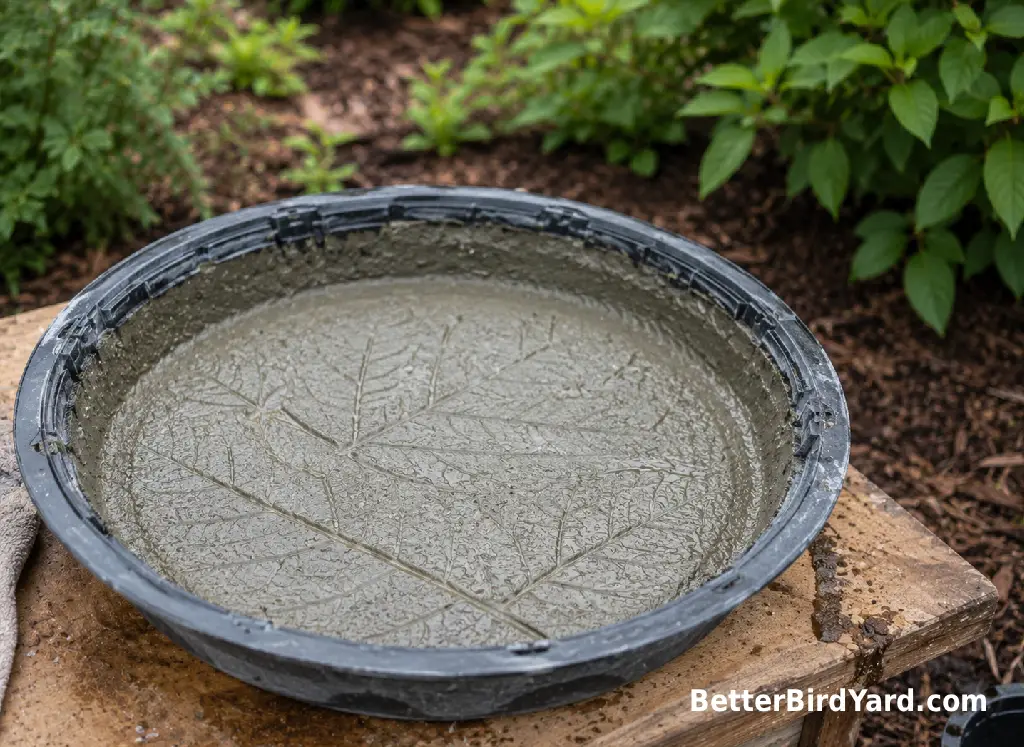
Concrete Bird Bath Molds: What To Know Before You Pour
A DIY concrete bird bath can be attractive, heavy, and long-lasting, but it is not the best first project for every reader. Concrete is messy, heavy, and unforgiving if the basin cures with a crack, a slick surface, or a shape that is too deep.
Common concrete bird bath molds include large leaves, shallow bowls, plastic plant saucers, trash can lids, and nested basins. The safer designs are broad and shallow, with sloping sides and a lightly textured interior. A deep, narrow concrete bowl may look dramatic, but it is less useful for small backyard birds.
If you pour your own concrete bird bath, keep these cautions in mind:
- Use a shallow mold so the finished water depth stays bird-friendly.
- Build in texture instead of creating a glass-smooth surface.
- Let the concrete cure fully according to the product directions before using it outdoors.
- Rinse the finished basin repeatedly before filling it for birds.
- Use only sealers or repair products labeled for outdoor water features and safe after full cure, and follow the label exactly.
- Do not use roofing tar, unknown spray coatings, peeling paint, or leftover household chemicals inside the basin.
Concrete baths are also vulnerable to freeze-thaw damage when water sits in cracks during winter. In colder climates, empty the basin before hard freezes or store a small DIY concrete bath somewhere protected. If the surface starts crumbling, flaking, or holding grime in rough cracks, retire it or repurpose it as a planter instead of a water source.
Where To Place Your Bird Bath So Birds Feel Safe
Placement can decide whether birds use your DIY bird bath or ignore it. A good spot gives birds a view of the yard, a quick route to cover, and enough open space that predators cannot hide right beside the water.
Partial shade is usually easier to manage than full sun. Shade slows evaporation and helps keep water cooler, but avoid placing the bath directly under messy branches where leaves, droppings, seed hulls, or sap fall into the basin all day. If you feed birds nearby, keep the bath far enough from feeders that spilled seed and droppings do not constantly wash into the water.
For most yards, start with a spot that is:
- Easy to reach for refilling and scrubbing.
- Near shrubs or small trees, but not buried in dense cover.
- Away from outdoor cat paths, brush piles, and low hiding spots.
- Not directly beside large reflective windows.
- Level, stable, and visible from where birds already move through the yard.
Project FeederWatch recommends keeping cats indoors to reduce bird predation risk and also recommends marking reflective windows with outside patterns spaced no more than two inches apart to help reduce bird-glass collisions. Those details matter around bird baths because water can draw birds into regular flight paths near your home.
If birds do not visit right away, do not rebuild the whole project. Move the bath a few feet, lower it, add stones, or try a soft drip. Backyard birds often need time to trust a new object.
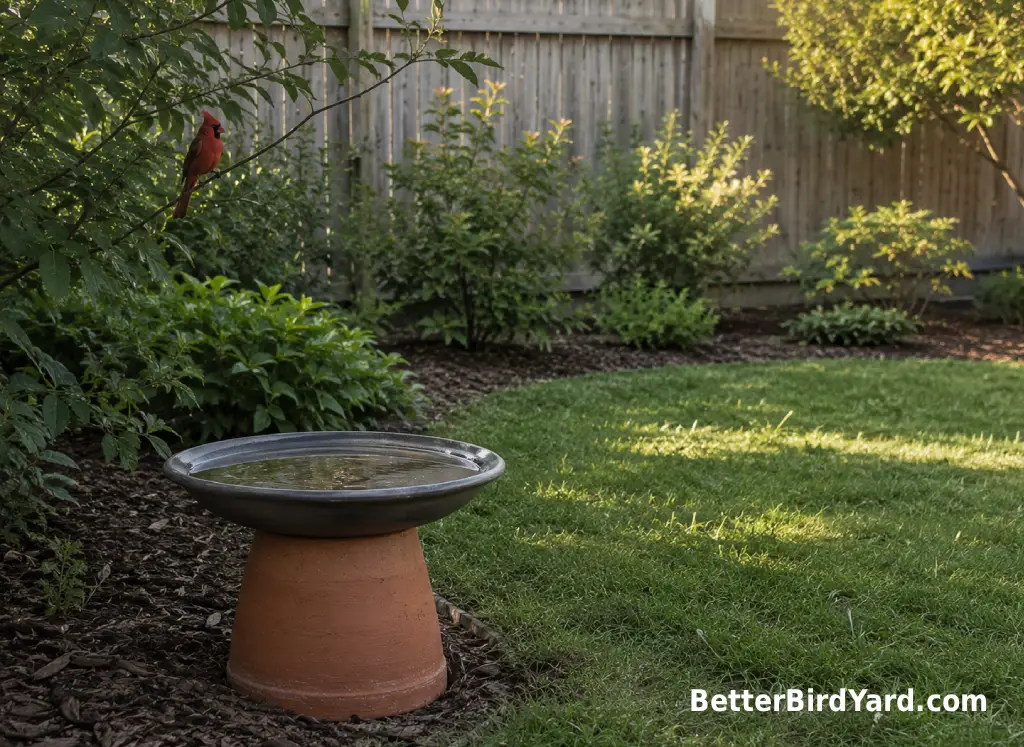
How To Clean And Maintain A DIY Bird Bath
Cleaning is the difference between a helpful bird bath and a risky one. Warm, shallow water can collect droppings, algae, feathers, soil, leaves, and mosquito larvae if it is ignored. Cornell Lab’s All About Birds recommends changing bird bath water at least every three days, more often in warm weather, and scrubbing immediately when algae starts to grow. Project FeederWatch recommends replacing bird bath water as often as possible, emptying and scrubbing if water is cloudy, moldy, or soiled, and scrubbing bird baths regularly.
A practical routine looks like this:
- Every day or two in hot weather: dump and refill if the water looks warm, dirty, low, or cloudy.
- At least every few days: replace the water even if it looks acceptable.
- Weekly, or sooner if dirty: scrub the basin with a stiff brush, rinse well, and refill.
- After heavy use, droppings, algae, or sick-looking birds nearby: clean more thoroughly and consider disinfecting according to trusted guidance.
Wear gloves when cleaning bird baths, especially if there are droppings or heavy grime. Keep a dedicated outdoor brush for bird bath use, and do not clean bird baths in the kitchen sink. If you use a diluted disinfectant during heavier cleaning, rinse carefully and let the basin dry completely before refilling. Project FeederWatch notes that cleaned feeders and bird baths can be disinfected with a diluted bleach solution, followed by careful rinsing and full drying before use.
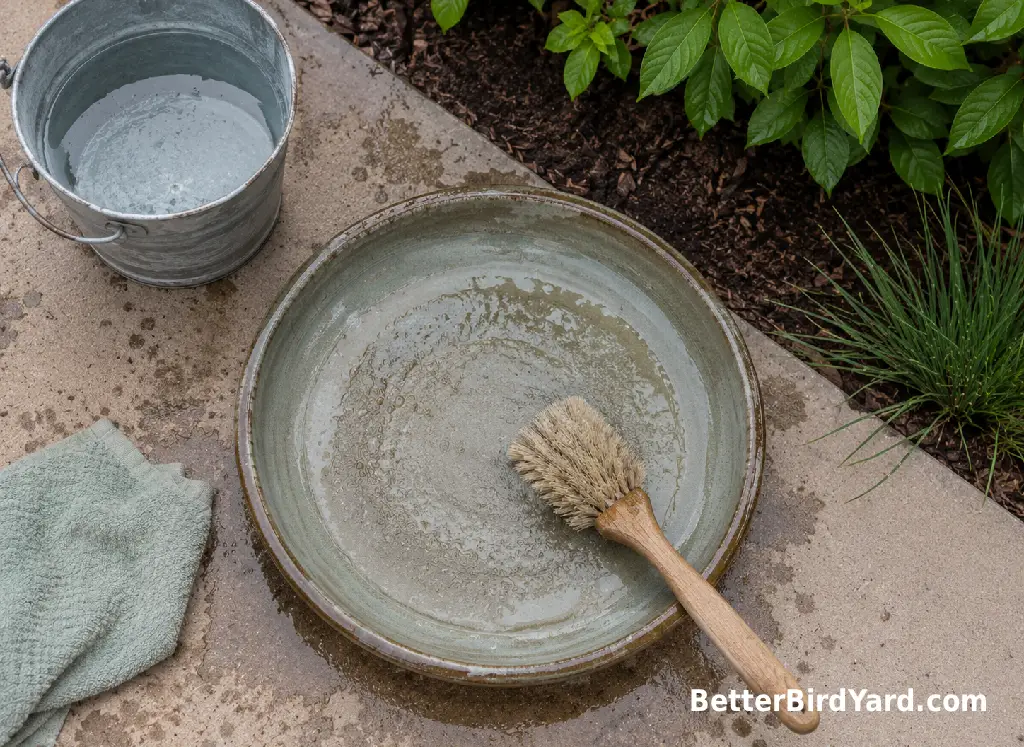
Common DIY Bird Bath Mistakes To Avoid
The most common DIY bird bath mistakes are easy to fix once you know what to look for.
- Too deep: Keep water shallow, especially near the edges. Add stones if needed.
- Too slippery: Smooth basins need texture, stones, or a different container.
- Too unstable: A narrow pedestal or lightweight bowl can tip in wind or during use.
- Too hard to clean: If you cannot dump and scrub it quickly, you may avoid the chore.
- Too close to predator cover: Nearby shrubs are helpful, but dense hiding spots right beside the bath are not.
- Too sunny all day: Full sun can heat water, speed evaporation, and encourage algae.
- Too decorative: Paint, glitter, peeling finishes, and unknown coatings are not worth the risk inside the water basin.
Another beginner mistake is adding too many features at once. A solar fountain, stones, plants, decorative figures, and multiple basins can look fun, but clutter makes cleaning harder and may reduce usable space for birds. Start with one clean basin. Once birds are using it and you have a good maintenance rhythm, then consider a small dripper or fountain.
Watch bird behavior without forcing conclusions. If birds land nearby but do not enter, the water may be too deep, the surface too slick, or the bath too exposed. If they drink from the rim but never bathe, try shallower water. If the bath gets dirty every day, move it away from feeders or overhead branches.
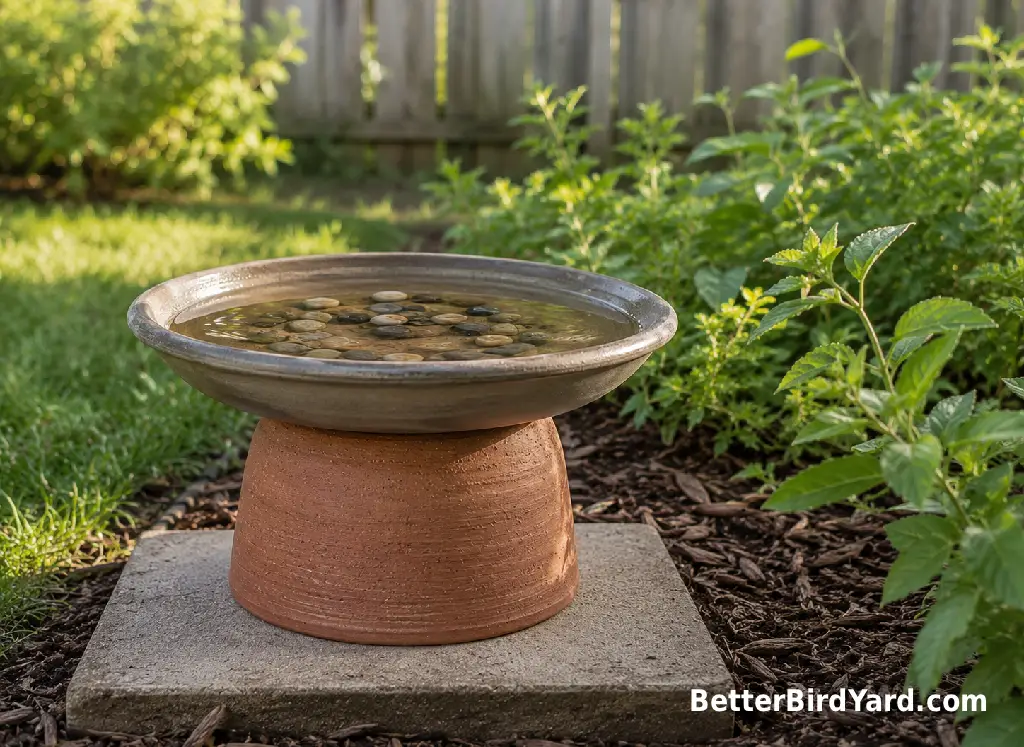
Seasonal, Local, And Wildlife Safety Checks
A DIY bird bath is not a set-it-and-forget-it project. Seasonal weather changes how often you refill, clean, and inspect it.
In summer, evaporation, algae, mosquitoes, and heavy bird use are the main concerns. Refresh water often, scrub when you see algae, and use gentle movement if it helps you prevent stagnant water. In fall, leaves can fill the basin quickly, especially under trees. In winter, freezing water can crack ceramic and concrete basins, so empty or protect baths that are not designed for freezing conditions. If you use a heated bird bath, choose equipment made for outdoor bird bath use and follow the manufacturer’s safety directions.
Local rules can matter, too. Apartment buildings, HOAs, municipalities, and areas with bear, raccoon, or rodent concerns may restrict outdoor feeding or water features. Avoid making a bird bath part of a messy feeding station, and check local ordinances or HOA rules if you are unsure.
If you notice birds that appear unusually lethargic, fluffed up, unable to fly, crusty-eyed, injured, or repeatedly sitting in or near the bath without normal alertness, do not try to diagnose or treat them. Clean the bath, consider pausing or reducing feeding and water crowding if multiple birds seem affected, and check your state wildlife agency or local wildlife rehabilitator for guidance. Project FeederWatch advises extra cleaning and caution when sick birds are observed, and state wildlife agencies such as Florida Fish and Wildlife note that licensed rehabilitators can assist with sick, injured, or orphaned wildlife.
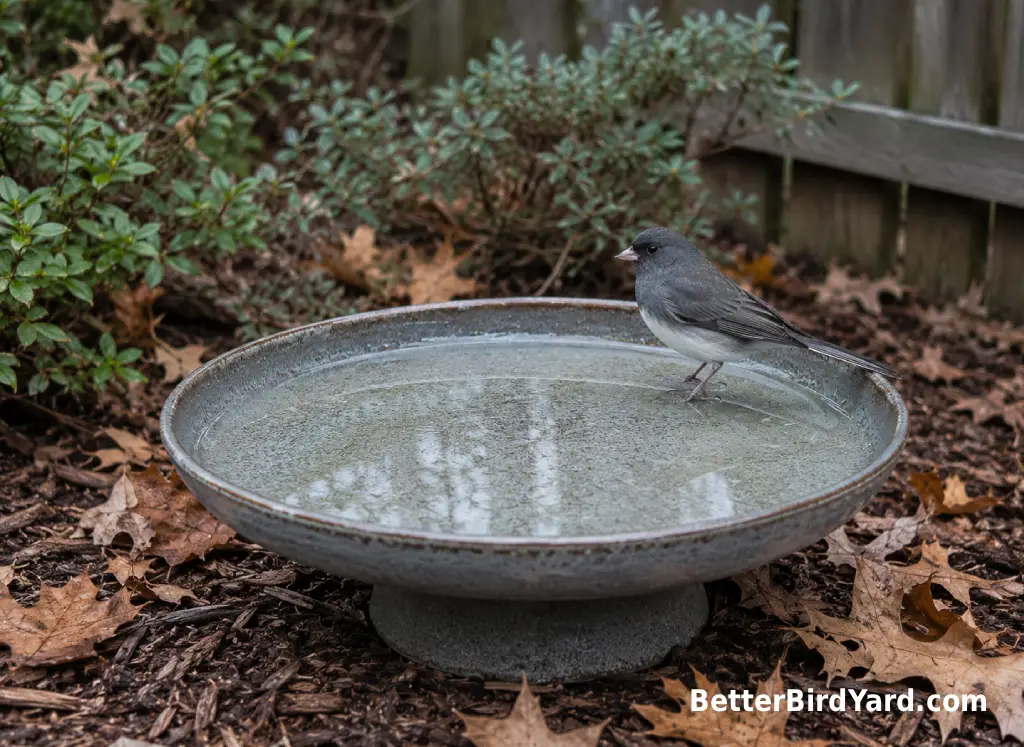
DIY Bird Bath FAQ
Can I Make A Bird Bath From A Plant Saucer?
Yes, a plant saucer can make a very good DIY bird bath if it is shallow, sturdy, easy to scrub, and free from flaking finishes. Set it on a heavy base, add clean stones for footing if needed, and keep the water fresh.
Is A DIY Bird Bath Fountain Worth It?
A small fountain or dripper can be worth it if it creates gentle movement and does not make cleaning harder. Avoid strong sprays, deep basins, or pumps that run dry. A still, clean bath is better than a dirty fountain.
Can I Use Concrete For A Bird Bath?
Yes, but the finished basin should be fully cured, rinsed well, shallow, and easy to clean. Avoid crumbling concrete, unknown coatings, or sealers that are not appropriate for outdoor water features after full cure.
How Often Should I Change The Water?
Change it at least every few days, and more often during hot weather, heavy use, or whenever the water looks dirty, cloudy, or low. Scrub algae right away rather than just topping off the basin.
Why Are Birds Not Using My Bird Bath?
Common reasons include water that is too deep, a slippery basin, a wobbly base, a location that feels too exposed, or a new object birds have not trusted yet. Try shallower water, better footing, a quieter location, or a gentle drip.
The Best DIY Bird Bath Is The One You Will Maintain
A DIY bird bath should make your yard more useful for birds without creating a maintenance problem for you. Start with a shallow basin, a stable base, clean water, good footing, and a safe location. Once that simple version works, you can experiment with a small fountain, a concrete mold, or a more decorative setup.
The best bird bath ideas DIY beginners can use are usually modest: a plant saucer, a few stones, a steady base, and a spot you walk past often enough to notice when the water needs changing. Birds do not need a perfect garden feature. They need reliable access to clean water and enough cover to feel safe.
Keep your expectations flexible. Bird activity will vary by region, season, weather, nearby habitat, and what natural water sources are available. Some days your bath may be busy; other days it may sit quiet. That is normal.
Build it simply, place it thoughtfully, and clean it often. That combination does more for backyard birds than any complicated design.